
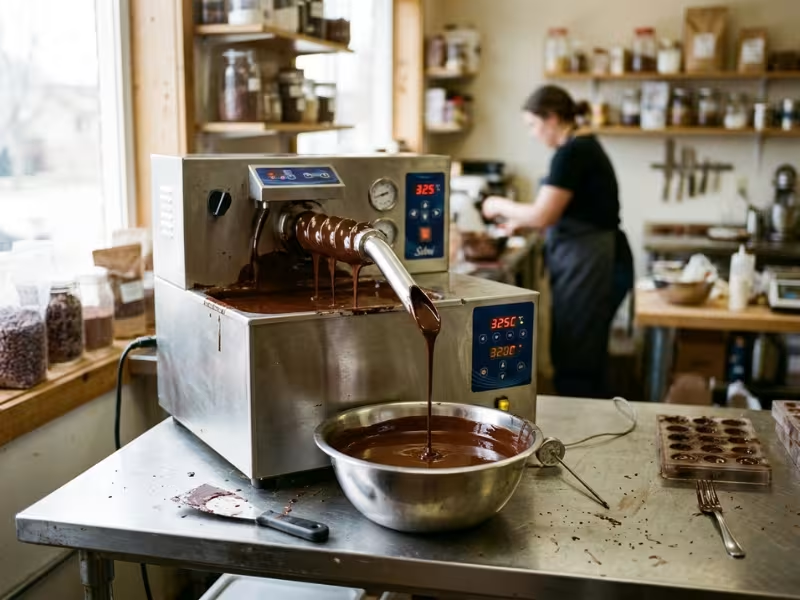
Many people melt good chocolate, dip their treats, and wait. Then the chocolate sets dull, streaky, or soft. It smears on your fingers instead of snapping clean.
The missing step is usually tempering. Most home makers skip it because manual methods feel fussy and unreliable. If the temperature drifts a few degrees, the batch fails.
I help chocolate makers fix these problems every week. SilkTemper doesn’t change your chocolate. It takes over the judgment calls, so you can hold the right temperature without constant guessing.
Why Tempered Chocolate Looks Glossy and Snaps Cleanly
Cocoa butter gives chocolate its shine and snap. But it can set in six different crystal forms, and only one of them gives you the finish you want.
Chocolate makers call it Form V. It packs tightly and evenly, and that tight structure reflects light, so the surface looks glossy. It breaks with a sharp, clean snap. It also shrinks slightly as it sets, so bars and bonbons drop out of the mold on their own.
Tempering guides the cocoa butter into that form. You first melt out every old crystal. Then you cool the chocolate so stable crystals start to grow. Finally, you warm it slightly to melt the weaker ones.
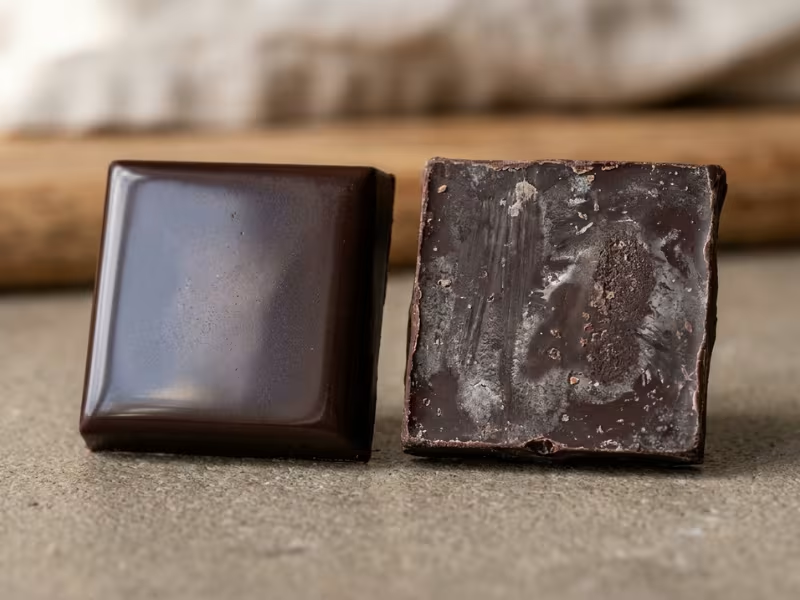
Skip that step, and the cocoa butter sets in a loose mix of crystals. You’ll spot it fast:
- The surface looks dull or patchy.
- The bite feels soft or crumbly, with no snap.
- Gray or white streaks appear within hours or days. That’s fat bloom.
- Pieces melt on your fingers as soon as you pick them up.
- Molded pieces stick and crack when you try to release them.
The right temperatures depend on the chocolate. Milk and white chocolate contain milk fat, which softens the cocoa butter, so they work a few degrees lower than dark.
|
Chocolate |
Melt to |
Cool to |
Work at |
|---|---|---|---|
|
Dark |
45–50°C |
27–28°C |
31–32°C |
|
Milk |
40–45°C |
26–27°C |
29–30°C |
|
White |
40–45°C |
25–26°C |
28–29°C |
Treat these as starting points and check your chocolate maker’s guidance, since recipes vary.
Each working range spans only one or two degrees. That narrow window explains why so many manual attempts fail.
Why Manual Tempering Often Fails in Real Kitchens
Most failed batches I see don’t start with bad recipes. They start with small temperature slips that a home kitchen makes easy.
Melting causes the first trouble. A microwave heats unevenly, so the edges scorch while the center still holds lumps. A double boiler brings its own risk. Steam drifts up and leaves a drop of water in the bowl, and the chocolate seizes into a grainy paste. Even without water, the bottom of the bowl runs hotter than the top. Your thermometer may read 31°C in one spot and 34°C two inches away.
Seeding trips up many careful makers. You need roughly 25–30% seed chocolate by weight, and that seed must already be tempered. Add too little, and you won’t have enough stable crystals to guide the rest. Add it while the chocolate is still too hot, and the seed melts away completely. Either way, the batch looks fine in the bowl and dull on the tray.
The room matters more than people expect. Above about 22°C, chocolate sets slowly, and slow setting invites bloom. A humid summer kitchen makes it worse.
Then comes the part most guides skip. You reach temper, start dipping, and the chocolate begins to drift. Cold strawberries pull heat out of the bowl. Ten minutes later, the chocolate thickens and coats unevenly. So you warm it briefly, overshoot by two degrees, and melt the crystals you worked so hard to build. Molding causes the same drop, because each pour leaves less chocolate in the bowl to hold heat.
Getting into temper is only half the job. Staying there for 30 or 40 minutes while your hands stay busy is the harder half, and it’s where most manual batches fail.

What SilkTemper Actually Does
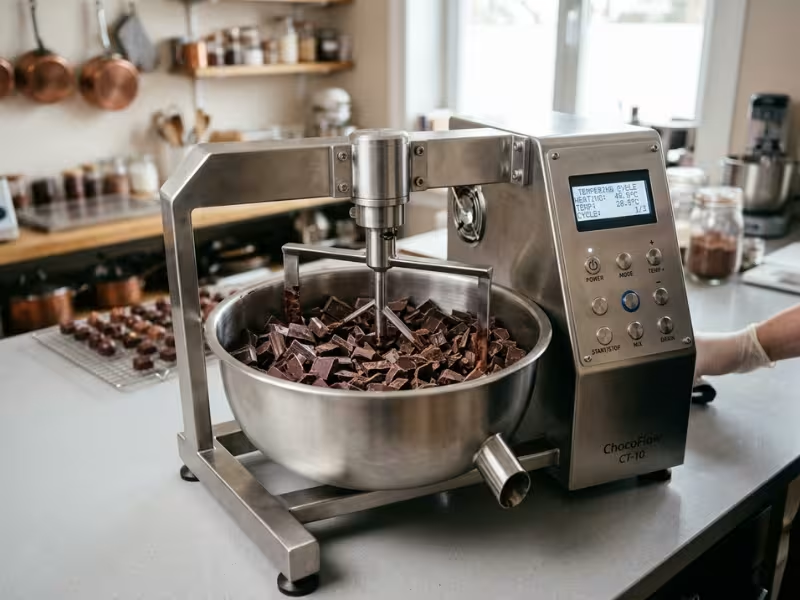
SilkTemper runs the same three stages you would run by hand: melt, cool, and rewarm. The difference is who watches the numbers. A built-in sensor reads the chocolate continuously, and the controller adjusts the heat for you.
That takes over the steps I see people get wrong most often:
- Judging when the melt is complete. The machine heats until every old crystal melts, then stops. You get no scorched edges and no hidden lumps.
- Timing the cool-down. It brings the chocolate down to crystal-forming temperature at a steady rate. You don’t have to guess when to add seed or how long to stir.
- Rewarming without overshooting. It lifts the chocolate to working temperature and stops within about a degree.
- Fighting drift while you work. Once the chocolate is in temper, the machine holds the working range. When cold fruit or a fresh pour pulls heat out, it adds just enough back.
That last point matters most, because the holding stage is where hand-tempered batches usually fall apart.
On a typical first run, you fill the bowl with chopped chocolate or pistoles, select dark, milk, or white, and press start. The machine moves through melt, cool, and rewarm on its own. Your main job is to stir when it prompts you. When the display shows ready, run a quick test strip before you start dipping.
A full cycle on a mid-size batch usually takes 30 to 60 minutes, depending on starting quantity and room temperature. Smaller loads finish faster, but they also lose heat faster once you start working. Check your model’s rated capacity and fill to at least the minimum line. A nearly empty bowl swings temperature faster than any controller can correct.
SilkTemper won’t rescue seized chocolate or fix a 28°C kitchen. It removes the guesswork, not the prep.
SilkTemper vs. Traditional Tempering Methods
A chocolate tempering machine only earns counter space if it beats what you already own. Here’s how SilkTemper compares with the methods I see most often, including where it falls short.
SilkTemper vs. Seeding
Seeding needs only a microwave, a bowl, and a reliable thermometer. It’s the cheapest way to start, but it still takes skill. You weigh the seed, melt in short bursts, and stir until the chocolate drops into range. Expect 15 to 25 minutes of steady attention.
Your results depend on your focus. A 300 g batch for one tray of bark works fine. Past about 1 kg, the bowl cools unevenly, and holding temper through a long dipping session gets hard. SilkTemper costs more up front, but it holds the working range while your hands stay busy. Cleanup is roughly equal, with one bowl either way.
For an occasional small batch, seeding works well. For longer sessions, the machine pulls ahead.
SilkTemper vs. Marble Slab Tabling
Pastry chefs like tabling because it cools chocolate fast. You can also watch the texture change as it thickens, though learning to read that change takes months of practice.
Tabling also makes a mess. Chocolate covers the slab, the scrapers, and often the counter. You need a cool room and a heavy marble slab, which take money and space. A skilled chef can temper 1 to 3 kg in about 10 minutes. A beginner often ends up with a streaky batch and a long cleanup.
SilkTemper removes the slab and the learning curve. It won’t match a pro’s speed, though, and it won’t teach you to judge chocolate by feel.
SilkTemper vs. Other Countertop Machines
Once you decide to buy a machine, the question shifts to which one. Countertop temperers range from basic warmers to fully programmed units. Many low-cost models only hold a set temperature, so you still add seed and manage the cool-down yourself.
When you compare models, check four things:
- Does it run the full melt, cool, and rewarm cycle?
- How tightly does it hold the working temperature?
- What are its minimum and maximum batch sizes?
- Can you remove the bowl easily for cleaning?
If you temper several kilos every session, a larger continuous machine may suit you better than SilkTemper.
|
Method |
Skill needed |
Mess |
Consistency |
Best for |
|---|---|---|---|---|
|
Seeding |
Medium |
Low |
Varies with focus |
Occasional small batches |
|
Tabling |
High |
High |
High in skilled hands |
Trained pastry chefs |
|
Basic countertop machine |
Medium |
Low |
Moderate |
Holding pre-tempered chocolate |
|
SilkTemper |
Low |
Low |
High and repeatable |
Frequent home and small-batch work |
Who Should Use SilkTemper, and Who Probably Shouldn’t
I don’t tell everyone to buy a tempering machine. Some people earn their money back in a month. Others would use it twice a year and leave it in a cupboard. Two things decide which group you’re in: how often you temper, and what a failed batch costs you.
Frequent home bakers fit first. If you dip, drizzle, or make bark most weekends, you already know the frustration of a tray that sets dull. SilkTemper turns that weekly gamble into a routine.
Holiday and gifting makers benefit too, even if they temper only a few months a year. That work comes in bursts. You might dip 200 strawberries for Valentine’s Day or box truffles for 30 friends in December. Manual temper rarely survives sessions that long.
Small sellers and market vendors often gain the most. Customers judge your chocolate by its shine and snap before they taste it. A streaky tray means discounted stock or pieces you can’t sell. Steady temper also keeps every batch looking the same from one market day to the next.
Hobbyists who mold bonbons or bars notice the difference fast. Molds demand well-tempered chocolate, the same rule that governs a commercial chocolate moulding line. Without it, pieces stick, crack, or release with dull patches. Shell work also needs the chocolate held in range for an hour or more.
A bowl, microwave, and thermometer still make more sense in some cases. Seeding works fine if you temper only a few times a year or work in batches under 300 g. It also fits if you mostly bake brownies or ganache, which don’t need temper, or if your budget is tight.
Here’s the math I walk clients through. Count your tempering sessions each month. Then add up what one failure costs you: wasted chocolate, ruined fruit or centers, spoiled decorations, and an hour of remelting. If you temper twice a month and lose one batch in four, that waste adds up quickly. For most regular users, the machine pays for itself well before the next holiday rush.
How to Get Better Results on Your First Batch
Most first-run problems I troubleshoot start before anyone presses start. Follow this order, and your first tray has a strong chance of setting glossy.
- Choose real couverture. Check the label. Cocoa butter should be the only fat, at about 31% or higher. Most chocolate chips contain less cocoa butter, and many add stabilizers to hold their shape in cookies. They melt thick and rarely temper well. Skip compound coatings, too. They use vegetable fat and don’t temper at all.
- Chop or portion evenly. Pistoles and callets go in as they are. Chop bars into pieces about 1 cm across. Mixed chunk sizes melt unevenly, and big lumps can hide old crystals.
- Keep every tool dry. Wipe the bowl, paddle, spatulas, and molds with a clean towel. One drop of water can seize the batch. Pat fruit completely dry before dipping.
- Load and run it correctly. Fill between the minimum and maximum lines. For a first run, I suggest about two-thirds full. Select dark, milk, or white, press start, and stir when the machine prompts you. Don’t skip or rush those stirs.
- Test before you commit. When the display shows ready, dip a knife tip or a parchment strip and set it down at room temperature. Good temper sets firm and glossy within 3 to 5 minutes and peels away cleanly. If it stays tacky or streaks, check the room temperature and let the machine stabilize before you dip anything.
- Work inside the holding window. Keep the room near 18–22°C. Bring fruit and centers to room temperature first, because fridge-cold items pull heat fast. When the level nears the minimum line, add fresh pistoles and let the machine bring them back into range. Retest every 20 to 30 minutes during long sessions.
- Stir gently. Use a spatula with slow, folding strokes. Never whisk. Trapped air leaves pinholes in molded pieces, so tap filled molds on the counter to release bubbles.
Start with about 500 g of dark couverture and a simple project, like bark or dipped fruit. Save bonbon shells for your third or fourth run.
Common Problems and What Usually Causes Them
When someone sends me a photo of a failed tray, I can usually name the cause in seconds. Most tempering trouble falls into five patterns.
- Chocolate sets dull. The surface looks matte or patchy, but the bite still feels fairly firm. Usually the chocolate lost temper just before it set, or it cooled too slowly. Check the room first. Above about 22°C, chocolate sets slowly and loses its shine. Then run a test strip to confirm the machine still holds temper.
- Streaks or bloom appear. Gray swirls show up within hours, or a white film appears after a few days. Swirls point to weak temper or uneven cooling. A dry, dusty film often means sugar bloom from humidity or fridge condensation. Check your storage first, and keep finished pieces at 15–18°C. If you chill them, let them warm up inside a sealed box before you open it.
- Chocolate gets too thick while working. It coats heavily and drips slowly off your fork. Too many crystals have formed, often because cold fruit or centers keep pulling heat out of the bowl. Bring your centers to room temperature, then let the machine rewarm the batch slightly. Don’t add oil to thin it.
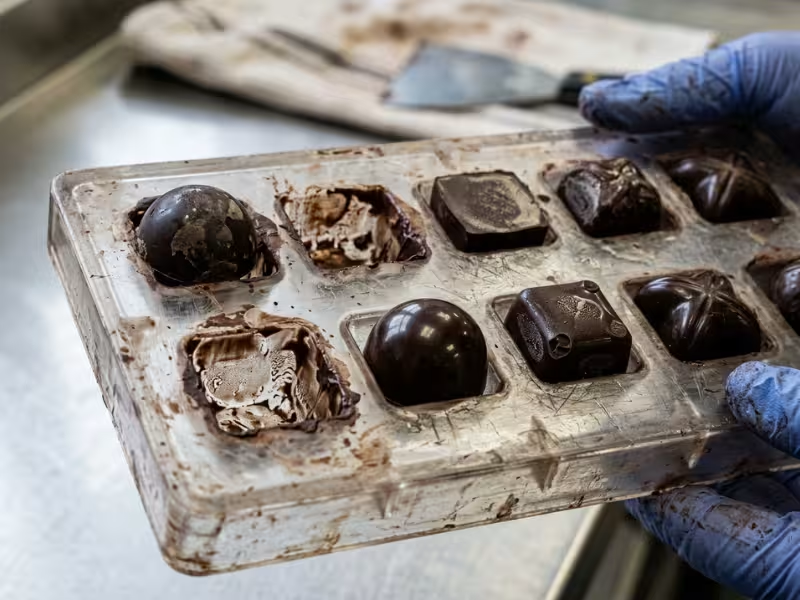
- Molded pieces release poorly. Bars stick, crack, or leave dull patches in the cavity. Weak temper stops the chocolate from shrinking away from the mold, and dirty or scratched molds make it worse. Polish molds with cotton wool and keep them near 20°C. Then chill filled molds for 10 to 15 minutes, until the pieces look loose.
- Chocolate tempers correctly at first, then drifts. Your first tray looks perfect, but the fourth one streaks. A low bowl level or a long session usually causes this. With little chocolate left, the temperature swings faster than the controller can correct. Top up with fresh pistoles before you reach the minimum line, and retest every 20 to 30 minutes.
Change one thing at a time, then test a strip. That habit tells you exactly which fix worked.
Care, Cleaning, and Practical Long-Term Use
A tempering machine can last for years. Most damaged units I inspect failed from small daily habits, not hard use.
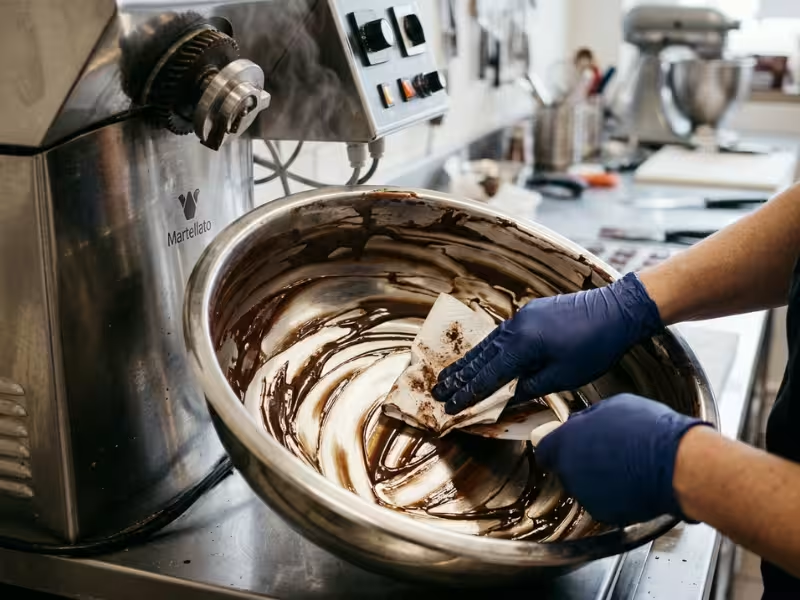
Clean the bowl while it’s still warm. Scrape leftover chocolate onto parchment, let it set, and save it for your next batch. Then wipe the bowl and paddle with paper towels before any residue hardens.
Keep water away from the base. The motor, drive shaft, and controls sit there, and moisture can short the electronics or rust the drive. Wash only the removable bowl and paddle in warm, soapy water, and dry them completely before you reassemble. Wipe the base with a barely damp cloth, never a wet one.
Store your chocolate with the same care. Keep it sealed at 15–18°C in a cool, dry cupboard. Cocoa butter absorbs smells fast, so keep it away from coffee, spices, and onions.
Three mistakes shorten machine life more than any others:
- Letting chocolate set hard in the bowl. Breaking it loose strains the motor and scratches the surface.
- Scrubbing with abrasive tools. Steel wool and rough pads leave scratches that trap residue.
- Storing the machine somewhere damp. Garages and basements let moisture corrode the wiring.
Clean it warm and keep it dry, and it will be ready every time you need it.
FAQs
What temperature should dark, milk, and white chocolate reach?
Dark chocolate melts at 45–50°C, cools to 27–28°C, and works at 31–32°C. Milk chocolate melts at 40–45°C, cools to 26–27°C, and works at 29–30°C. White chocolate melts in the same range as milk, cools to 25–26°C, and works at 28–29°C. Some brands list slightly different numbers for their recipes, so check the package too.
Can you temper chocolate chips, or is couverture better?
Couverture works far better. Most chips hold less cocoa butter, and many contain stabilizers that help them keep their shape in cookies. They melt thick and rarely set with real gloss or snap. Look for couverture that lists cocoa butter as the only fat, at about 31% or more.
How long can tempered chocolate stay in working condition?
By hand, you usually get 15 to 30 minutes before it thickens or drifts. SilkTemper can hold the working range for hours if you keep the bowl above the minimum line. During long sessions, I still run a test strip every 20 to 30 minutes.
Why did my chocolate turn dull or streaky?
Most often, it lost temper before it set, or it cooled too slowly. A room above about 22°C causes both. Cold fruit, a low bowl level, or overheating during rewarming can also push it out of range. A dry white film that shows up days later usually points to sugar bloom from humidity or fridge condensation.
Is a tempering machine worth it for occasional use?
Usually not. If you temper only a few times a year in batches under 300 g, a bowl, a microwave, and a good thermometer will do the job. The machine pays off when you temper often, work in long sessions, or sell what you make.
Can you re-temper chocolate that has already set?
Yes. Melt it all the way back to the full melt temperature, then run the cycle again. That erases the old crystals and gives you a fresh start. Skip any chocolate that touched water or scorched, because it won’t temper properly.
Conclusion
SilkTemper works because it holds your chocolate in a steady working range. Most batches fail while you dip and pour, long after the first temper. The machine catches that drift before it turns into streaks.
It won’t fix everything, though. Chips with stabilizers, a wet spatula, or a 26°C kitchen will still ruin a tray. Good couverture and careful prep remain your job.
So start small. Temper 500 g of dark couverture for one tray of bark or dipped fruit. Run a test strip, watch how the chocolate behaves, and learn the rhythm of topping up and retesting. Once that first tray sets glossy and snaps clean, move on to molds and bigger batches.