
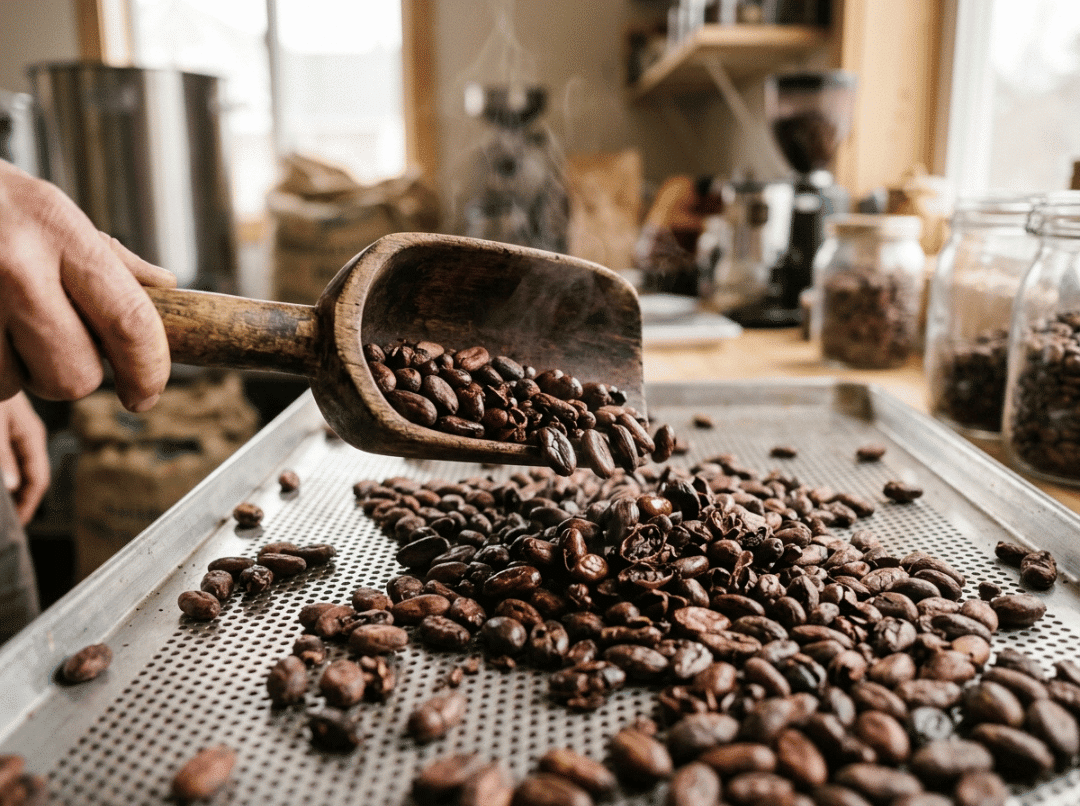
Roasting is where chocolate flavor is made or lost. A raw cocoa bean tastes sharp, sour, and astringent. Heat transforms it into the warm, nutty, chocolatey base you recognize. Learning how to roast cocoa beans well is the difference between chocolate that sings and chocolate that never quite comes together, because no amount of grinding, conching, or tempering can fix flavor the roast failed to build.
This article covers what actually controls a roast, recommended profiles for home, artisan, and industrial scales, how to read your beans as they cook, how to fix the problems that show up most often, and how to choose the right roaster when you outgrow your current setup.
What Cocoa Bean Roasting Actually Does
Roasting does three jobs at once, and understanding them tells you what to watch for.
First, it builds flavor. Heat drives the Maillard reaction between sugars and amino acids inside the bean, creating the nutty, toasty, chocolate notes that define the final bar. Most of this development happens in the middle of the roast, roughly between 120°C and 135°C.
Second, it strips out harsh acidity. Fermentation leaves volatile acids in the bean, mainly acetic acid, which smells like vinegar. A proper roast drives these off as steam. If your finished chocolate still tastes sour, the roast usually didn’t give those acids enough time or airflow to escape.
Third, it loosens the shell. Heat dries the husk and makes it brittle, so it flakes away from the nib during winnowing. A bean that roasts well cracks cleanly. A bean that clings to its shell almost always tells you the roast fell short.
Keep those three jobs in mind, and every decision at the roaster gets easier.
What to Check Before You Apply Any Heat
Quality control starts before the beans ever hit heat. A great profile cannot rescue poor raw material, and most inconsistent roasts trace back to skipped inspection.
Bean Size
Sort your beans by size before roasting. In practice, uneven bean size causes more roasting inconsistency than most beginners expect. Small beans scorch and turn bitter before the large ones develop, so a mixed batch tastes burnt and raw at the same time. A quick sieve or a visual sort for small lots solves this. Roast similar sizes together and your color evens out immediately.
Fermentation Level
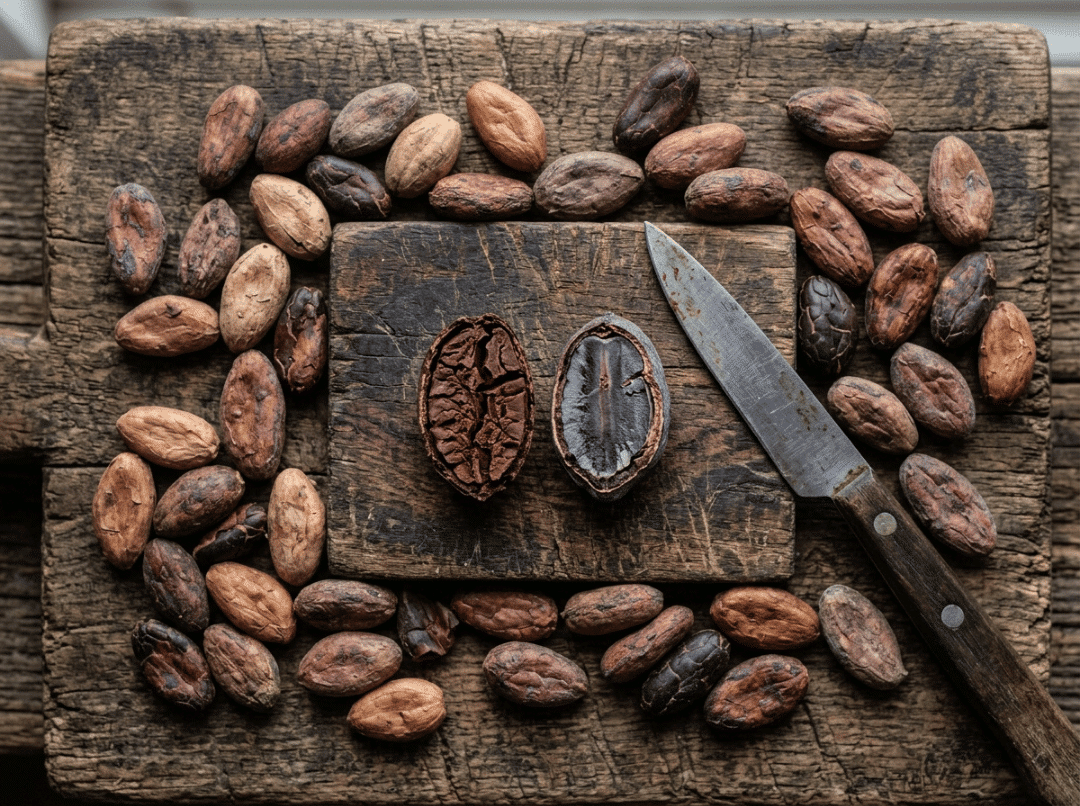
Fermentation happens on the farm, but it dictates how you roast. Cut a few beans open and check the inside. Brown, cracked interiors signal good fermentation and develop flavor readily, so ease off the heat. Slate-gray or tightly packed purple centers mean the bean never fully developed, and pushing it harder only adds bitterness without adding flavor.
Moisture
Incoming beans usually carry 6–8% moisture, and that number drives your drying phase. Beans that feel soft or smell musty may hold too much water and risk mold. Dry, firm beans that rattle slightly are ready and will crack cleanly later. When beans come in wetter than usual, extend the drying stage before you push into development rather than forcing the heat up.
Defect Sorting
Pull out the flats, the stuck-together doubles, anything moldy or damaged, and the stones and sticks that come with farm-dried lots. One moldy bean can taint an entire batch with a musty note that survives all the way to the bar. This takes minutes and protects hours of work.
The Five Variables That Control Every Roast
Every roast profile comes down to five levers. Master these and you can adapt any profile to any bean.
Temperature. Cocoa roasts far cooler than coffee. The working range sits between roughly 110°C and 150°C, and most flavor develops well below the top of that band. Push past 150°C and you scorch the outside while creating harsh, smoky notes. A darker bean is not a better-roasted bean.
Time. Most roasts run 15 to 35 minutes. Longer times at moderate heat build deep, rounded flavor. Rushing leaves beans sour and underdeveloped, no matter how dark they look.
Airflow. Good airflow carries away moisture, steam, and the acids you want gone, and it keeps heating even. This is why convection roasters produce cleaner flavor than a still oven. For most small-batch makers, airflow matters as much as peak temperature.
Batch size. Overloading is the most common home mistake. Too many beans block airflow, heat can’t reach the center of the pile, and the batch roasts unevenly. Smaller, well-spaced loads roast far more predictably.
Heat uniformity. Beans need to move to roast evenly. Stirring, tumbling, or a rotating drum keeps every bean exposed to the same heat. Without agitation, you get a patchy mix of light and dark in a single batch.
Roasting Profiles by Scenario
There is no single correct roast. Your equipment and your goals shape the approach, so the guidance below splits by scale. Treat every number as a starting range and adjust for origin and moisture.
Home or Lab Roasting (100–500 g)
A convection oven or small sample roaster works well here. This scale is built for experimenting with new origins and dialing in flavor, not for output. Keep temperatures moderate, stay in the 110–140°C range, and watch the beans closely, since small batches move fast and can tip from developed to burnt in under a minute. Total time usually runs 20–35 minutes.
Artisan Chocolate Workshop (1–10 kg)
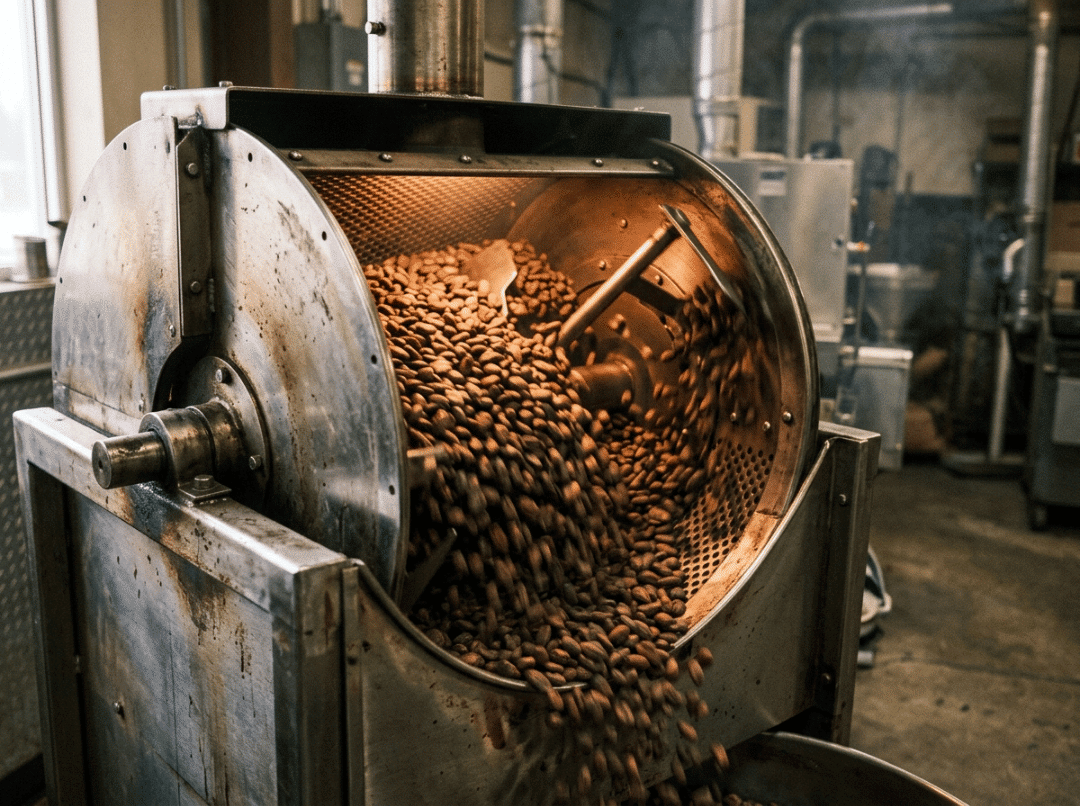
A drum roaster gives you the control and repeatability a workshop needs. The 110–145°C range over 20–30 minutes covers most beans. The habit that separates consistent makers here is logging: record temperature, time, and what you observed at each stage. Written profiles let you reproduce a great batch instead of chasing it by luck every time.
Commercial and Industrial Production (50 kg and up)
At this scale, continuous or large-batch machines take over and your priorities shift to repeatability, throughput, energy use, and easy cleaning. Programmable profile control stops being a luxury. Precise, saved roast curves are the only way to hold flavor steady across shifts and operators, typically running 120–150°C over 15–30 minutes.
Quick Comparison
|
Scenario |
Equipment |
Batch Size |
Temp Range |
Total Time |
Key Priority |
|---|---|---|---|---|---|
|
Home / lab |
Oven or sample roaster |
100–500 g |
110–140°C |
20–35 min |
Flavor experimentation |
|
Artisan workshop |
Drum roaster |
1–10 kg |
110–145°C |
20–30 min |
Repeatable profiles |
|
Industrial |
Cocoa bean roasting machine |
50 kg–1 ton+ |
120–150°C |
15–30 min |
Throughput + consistency |
A Sample Three-Stage Profile
Most roasts move through three stages. Let the cues guide your timing rather than the clock alone.
|
Stage |
Temperature |
Duration |
What to Watch For |
|---|---|---|---|
|
Drying |
100–110°C |
5–10 min |
Moisture evaporates; earthy, damp smell |
|
Development |
120–135°C |
15–20 min |
Vinegar smell fades; the room smells like brownies |
|
Finish |
up to 140°C |
2–5 min |
A faint pop; deep, even aroma |
A wetter or larger bean needs a longer drying phase. A delicate, well-fermented origin may finish sooner than the table suggests, so trust your senses over the numbers.
How to Know When Cocoa Beans Are Done Roasting
Your senses are better instruments than any timer. Read three signals together.
- Color. Watch for an even shift from purple or pale brown to a deep, uniform brown. You want consistency across the whole batch, not a mix of light and dark beans in the same tray. The shell should look dry and slightly loosened.
- Aroma. Early on, you’ll smell a sharp, vinegary note as acids burn off. That gives way to warm, brownie-like, nutty aromas as development takes hold. The moment a sharp, acrid, burnt smell appears, stop. You’ve gone too far.
- Sound. Near the finish, listen for a faint crack. It’s far subtler than coffee’s loud snap, but it signals the shell drying and the roast nearing completion.
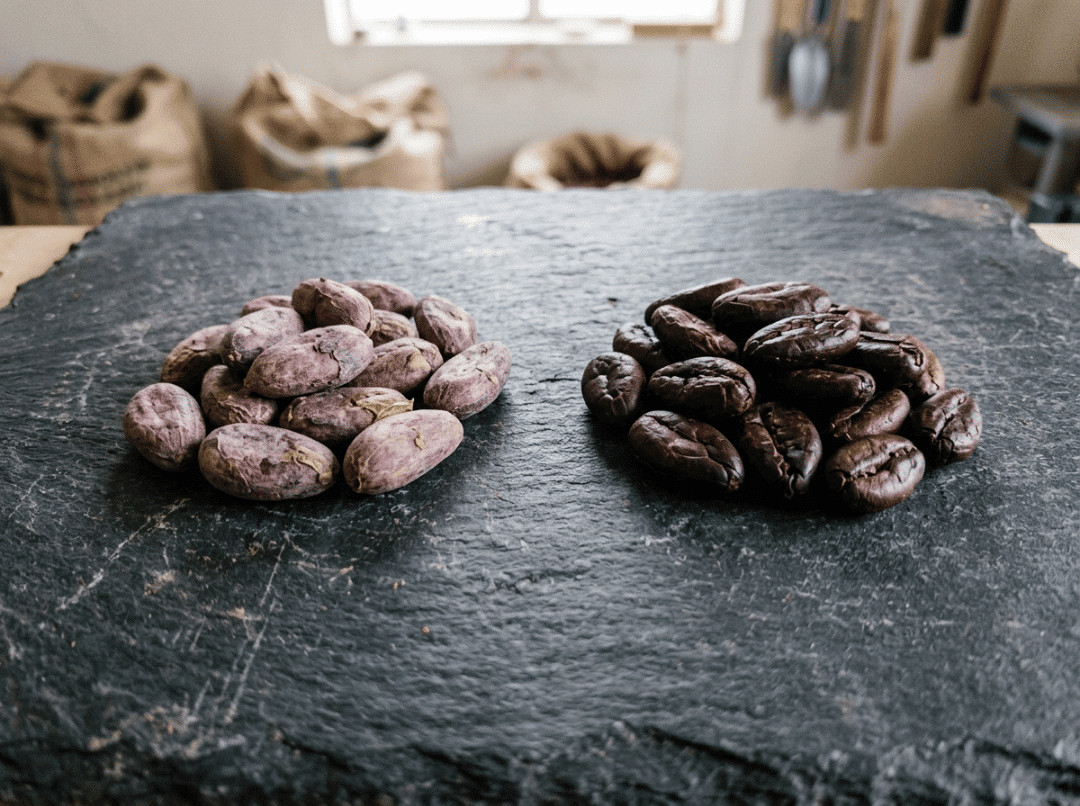
When color, aroma, and sound line up, and before any burnt smell arrives, the beans are ready. Here is how under- and over-roasting show up:
|
Under-Roasted |
Over-Roasted |
|---|---|
|
Sour, sharp acidity |
Flat, lifeless flavor |
|
Astringent, drying mouthfeel |
Ashy, smoky notes |
|
Raw, green vegetal notes |
Harsh bitterness |
|
Husk clings to the nib |
Scorched, blistered surface |
Fixing the Most Common Roasting Problems
Even experienced roasters hit snags. Diagnose by symptom, then adjust one variable at a time.
Beans taste too acidic or sour.
Cause: the roast didn’t remove enough volatile acid, usually from too short a drying phase or weak airflow. If acidity stays sharp but the beans already look dark, the problem is airflow, not roast time. Fix: extend drying and development, and improve ventilation so the acids escape as steam.
Beans taste burnt or bitter.
Cause: finish temperature ran too high, or the roast went too long. Fix: lower your finish temperature, shorten total time, and cool the beans fast once they’re done.
The roast is uneven, light and dark mixed together.
Cause: mixed bean sizes, an overloaded roaster, or too little agitation. Fix: sort by size, cut your batch size, and keep the beans moving throughout.
The husk won’t separate from the nib.
Cause: this is almost always insufficient drying or finish development, not finish temperature, and sometimes leftover moisture or poor cooling. Fix: roast a little longer so the shell turns brittle, and cool the beans fully before winnowing. More force during winnowing rarely helps.
Cooling and Winnowing: The Steps People Rush
The roast isn’t finished when you pull the beans. Hot beans keep cooking internally, a effect called carry-over cooking, and slow cooling can overshoot your target and burn off delicate aromatics. Cool them fast to lock in the flavor you built.
For small batches, spread the beans thin on a cool tray or run a fan over them. Industrial setups use dedicated cooling trays with forced airflow to chill large volumes in minutes.
Once cooled, the shell should feel like thin parchment. Crack the beans gently and the husk flakes away from the nib. For small batches, a hair dryer on a cool setting blows the light husk aside while the heavier nibs stay in the bowl. At larger volumes, a dedicated cocoa bean cracker and winnower separates shell from nib in one continuous pass and saves enormous time.
How to Choose a Cocoa Bean Roaster
The right roaster depends on your volume and your goals. Here is where each option fits, and the point at which you outgrow it.
Oven or Manual Roasting
Fine for hobbyists and first experiments. A convection oven is cheap and teaches you the basics. Its limits show up fast, though: uneven heat, weak airflow, and no way to save a profile make consistency a constant fight.
Drum Roaster
The right step up for artisan makers who need repeatable results. The rotating drum keeps beans moving for even color and lets you log and reproduce profiles. For most workshops, this is the sweet spot between control and cost.
Industrial Cocoa Bean Roasting Machine
The Cocoa Bean Roaster is built for workshops scaling up and for factories. This is the point where manual methods stop being viable. Once you’re roasting daily, chasing consistency by hand across large batches, or losing flavor between operators, hand methods cost you more in wasted beans and uneven bars than a proper machine would. When evaluating one, check:
- Capacity — does it match your real output, not just today’s?
- Profile control — can you program and save roast curves?
- Temperature accuracy — how tightly does it hold a set point?
- Airflow — does it clear moisture and acids well?
- Energy use — what does it cost to run at volume?
- Cleaning and maintenance — how simple is daily upkeep?
Match the Machine to Your Output
- Under 1 kg per batch: oven or small sample roaster
- 1–10 kg per batch: drum roaster
- 50 kg and up: industrial roasting machine, ideally planned alongside your winnower and grinder as one line
If you’re building a full bean-to-bar process, plan the roaster together with the rest of your equipment rather than buying it in isolation. A roaster that outpaces your winnower just moves the bottleneck.
When It’s Time to Talk Equipment
Consistent roasting comes down to controlling five variables and using a machine that matches your volume. If you’re still on an oven and fighting uneven batches, or your drum roaster can’t keep up with orders, that friction is the signal to move up.
We build roasters and full processing lines for makers at every scale, from artisan workshops to commercial production. Tell us your target volume and the beans you work with, and we’ll recommend the right setup and a starting profile to match. Reach out any time for a tailored quote or a straightforward roasting consultation.
Frequently Asked Questions
What temperature should I roast cocoa beans at?
Roast between roughly 110°C and 150°C, with most flavor developing around 120–135°C. This is much lower than coffee. Staying below 150°C protects the delicate aromatics and prevents a scorched, bitter flavor.
How long does it take to roast cocoa beans?
Most roasts take 15 to 35 minutes. Smaller batches roast faster and need closer watching, while larger industrial batches sit at the longer end. Bean size and moisture shift the timing, so lean on sensory cues alongside the clock.
How can I tell when cocoa beans are done roasting?
Watch for a deep, even brown color, a warm nutty-brownie aroma replacing the early vinegar smell, and a faint crack near the finish. When all three align, and before any burnt smell appears, they’re ready.
Can I roast cocoa beans in an air fryer or convection oven?
Yes. The strong airflow in both promotes even roasting. Set the temperature around 130°C and shake or stir every few minutes so nothing scorches on one side.
How long do roasted cocoa beans stay fresh?
Stored airtight in a cool, dark place, they keep for about 6 to 9 months. For the best flavor in chocolate making, use them within about four weeks of roasting.
Do I need to roast cocoa beans before making chocolate?
In almost all cases, yes. Roasting develops chocolate flavor, drives off harsh acids, reduces microbial risk, and makes the husk brittle for easy winnowing. Unroasted beans taste sour and astringent by comparison.