Every chocolate bar you’ve ever loved started as a lumpy, fermented seed pulled from a tropical pod. The journey from that raw bean to a smooth, glossy bar is part science, part craft, and surprisingly doable at home. If you’ve ever wanted to make chocolate completely from scratch, you’re in the right place.
This guide walks you through the entire bean-to-bar process, from choosing cacao beans to wrapping your first finished bar. You’ll learn what equipment you need, how each step shapes flavor, and where beginners tend to slip up. Whether you’re a curious home cook, a serious hobbyist, or someone dreaming of starting a small craft chocolate brand, this walkthrough gives you a clear, repeatable path to follow.
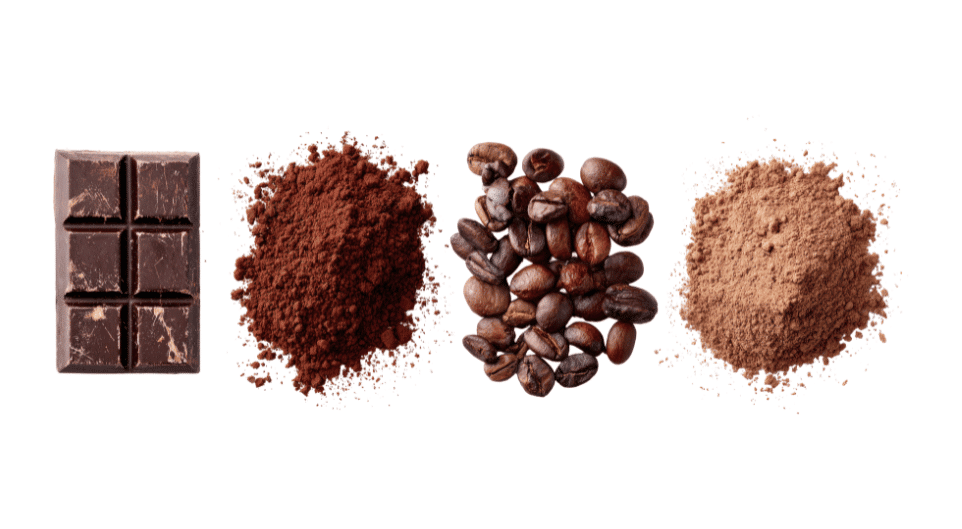
Quick Answer: How Bean-to-Bar Chocolate Is Made
Bean-to-bar chocolate is made by taking raw cacao beans through a series of controlled steps: sourcing, cleaning, roasting, cracking, winnowing, grinding, refining, conching, tempering, and molding. A maker roasts the beans to build flavor, cracks them into nibs, removes the shells, and then grinds the nibs into a thick liquid called chocolate liquor.
The heart of the process happens in a melanger, a stone grinder that refines the chocolate over many hours until it feels silky on the tongue. After refining and conching for flavor, the chocolate is tempered for shine and snap, then poured into molds. Makers control every stage because it gives them full command over flavor, transparency, and quality, something mass producers simply can’t match.
What Bean-to-Bar Chocolate Means
The Bean to Bar Definition
Bean-to-bar means one maker controls every stage of production, from the raw cacao bean to the finished bar. Nothing is outsourced. The same person or small team handles roasting, grinding, refining, and molding.
Why does this matter? Because flavor is built at every step. When a maker controls the whole chain, they can trace exactly where their beans came from, fine-tune each batch, and protect the quality of the final product. That level of control is the difference between a forgettable bar and one with real character.
Chocolate Maker vs Chocolatier
People mix these terms up constantly, but they mean different things. A chocolate maker starts with raw cacao beans and turns them into chocolate. A chocolatier starts with finished chocolate and turns it into confections like truffles, bonbons, and filled bars.
Put simply: makers create chocolate, chocolatiers create with chocolate. Bean-to-bar belongs to the maker’s world.
Craft vs Industrial Chocolate
Large manufacturers often buy pre-made chocolate coatings or bulk cocoa solids, then blend in additives, emulsifiers, and flavorings to keep costs low and taste consistent. The goal is scale and uniformity.
Craft makers take the opposite approach. Most small-batch bars use a remarkably short ingredient list: cacao beans, cocoa butter, and cane sugar. That simplicity lets the beans’ natural flavor shine through, which is exactly the point of bean-to-bar chocolate.
Equipment Needed to Make Bean-to-Bar Chocolate
You don’t need a factory to make great chocolate, but you do need a few key tools. Here’s what to gather:
- Roaster, oven, or coffee roaster for developing bean flavor.
- Cracker and winnower to break beans into nibs and separate out the shells.
- Melanger (stone grinder) — the centerpiece of your setup, used to refine nibs into smooth chocolate.
- Digital thermometer for accurate roasting and tempering temperatures.
- Tempering setup, either a marble slab or an automated tempering machine.
- Polycarbonate molds and food-safe packaging for finishing your bars.
- Kitchen scale to keep your batch ratios consistent.
Quick win: You can start small. A basic setup can be as simple as a home oven for roasting, a hair dryer rigged as a winnower, and a compact tabletop melanger. Many serious makers began exactly this way before upgrading their gear.
Step 1: Source High-Quality Cacao Beans
Great chocolate begins with great beans. No amount of skill later in the process can fix a poor starting ingredient, so this step matters more than any other.
Cacao Bean Types
You’ll often hear about three commonly referenced categories of cacao: Criollo, Forastero, and Trinitario. Criollo is prized for its delicate, complex flavor but is rare and tricky to grow. Forastero is hardy and widely planted, making up most of the world’s supply. Trinitario is a hybrid that blends qualities of both.
Keep in mind that flavor isn’t decided by genetics alone. Where the beans grow and how they’re handled after harvest play a huge role, too.
Origin and Terroir
Cacao grows in a narrow band near the equator, and each region leaves its own fingerprint on the beans. Just like wine grapes, cacao picks up flavor notes from its soil, climate, and surroundings. Beans from one country might taste bright and fruity, while beans from another lean nutty, earthy, or even smoky.
Direct Trade and Ethical Sourcing
Many craft makers work directly with farmers instead of buying through anonymous bulk channels. This direct relationship improves quality, since farmers get feedback and fair pay for better beans. It also supports more ethical, sustainable farming, which more and more chocolate lovers care about.
Fermentation and Drying at Origin
Before beans ever reach you, they go through two crucial steps at the farm. Fermentation, which happens right after harvest, breaks down the pulp around the beans and develops the flavor precursors that later become chocolate. Drying then reduces moisture so the beans can ship safely without molding. Well-fermented, properly dried beans are the foundation of every good bar.
Step 2: Clean and Sort the Beans
Raw cacao beans arrive with the occasional surprise: stray sticks, small stones, clumps, and the odd flat or moldy bean. Before roasting, inspect your beans and pick out anything that doesn’t belong.
Sorting for size matters too. Beans that vary widely will roast unevenly, leaving some scorched while others stay underdone. Aim for consistency so your roast comes out balanced.
For tools, beginners can simply hand-sort on a clean table or tray. Larger operations use vibrating screens that automatically separate beans by size and shake out debris.
Step 3: Roast the Cacao Beans
Roasting is where raw, harsh beans transform into something that actually smells like chocolate. It’s also one of the most creative steps in the process.
Why Roasting Matters
Heat triggers the Maillard reaction, the same chemistry that browns toast and sears a steak. This reaction develops hundreds of aromatic compounds, turning bitter, sour beans into a rich, recognizable chocolate flavor. Roasting also kills off any lingering bacteria and loosens the shells, making the next steps easier.
Roasting Methods
You have options here. Drum roasters tumble beans for an even, hands-off roast. Convection ovens work well for home makers and offer good control. Dedicated cacao roasters give the most precision but cost more. Even a standard kitchen oven can produce excellent results when you watch it closely.
Building a Roast Profile
There’s no single “correct” roast. Your beans’ origin guides the time and temperature you choose. A lighter roast preserves bright, fruity notes, while a longer, hotter roast brings out deep, nutty, or earthy flavors. Part of the fun is experimenting to find what makes each batch sing.
Roasting Pitfalls
Watch the extremes. Under-roasting leaves sour, undeveloped flavors and a raw edge. Over-roasting, on the other hand, burns away the very characteristics that make fine cacao special, flattening everything into generic bitterness. With premium beans, restraint usually pays off.
Step 4: Crack and Winnow the Beans
Once your beans cool, it’s time to break them open and free the good stuff inside.
Cracking breaks the roasted beans into small pieces called nibs, along with loose papery shell fragments. Winnowing then uses airflow to blow away the light shells while the heavier nibs fall and collect. A simple fan, a hair dryer, or a purpose-built winnower all get the job done.
Clean separation matters. Shells are fibrous and bitter, and any left behind will make your chocolate gritty and harsh. Take the time to remove as much shell as you can.
Don’t toss those shells, though. They make excellent garden mulch or steep into a pleasant cacao tea, so nothing goes to waste.
Step 5: Grind Nibs Into Chocolate Liquor
Now the magic starts. As you grind the nibs, they break down into a thick, flowing liquid known as chocolate liquor. Despite the name, there’s no alcohol involved; it’s pure ground cacao.
This happens because nibs are roughly half cocoa butter by weight. The friction and heat of grinding melt that natural fat, turning the solid nibs into a smooth, dark paste. This stage sets the table for the real refining work your melanger is about to do.
Step 6: Refine the Chocolate in a Melanger
This is the heart of bean-to-bar chocolate making, and where patience truly pays off.
What a Melanger Does
A melanger uses heavy granite stone rollers that turn slowly against a granite base. As they grind, they crush the cacao particles smaller and smaller over many hours. This continuous grinding is what transforms grainy paste into the silky chocolate you expect from a quality bar.
When to Add Sugar and Other Ingredients
Once your chocolate liquor is flowing smoothly in the melanger, you can begin adding other ingredients. Cane sugar usually goes in gradually, so it incorporates evenly. If you want a smoother, more fluid chocolate, add extra cocoa butter. For milk chocolate, milk powder is added to the mix at this stage as well.
Target Particle Size
Your tongue can detect grittiness down to surprisingly fine levels. To feel truly smooth, chocolate is typically refined to a size of roughly 15 to 25 microns. Anything coarser and you’ll notice a sandy texture. Reaching this fineness is exactly why the melanger runs for so long.
Typical Refining Time
Refining often takes anywhere from several hours to a couple of full days, depending on your beans, your recipe, and your machine.
It helps to understand the difference between the two overlapping ideas here. Refining is about reducing particle size for smoothness. Conching is about developing flavor and texture through aeration. In a home melanger, these two processes often happen together in the same machine.
Step 7: Conche for Flavor and Texture
Conching is the finishing touch that rounds out your chocolate’s flavor and feel.
At its core, conching means continuously aerating and agitating the warm chocolate. This movement does several important things. It drives off lingering acidic flavors, like the sharp acetic acid left over from fermentation, that would otherwise make your bar taste sour. It also smooths the texture and helps the cocoa butter coat every particle evenly, giving the chocolate its melt-in-your-mouth quality.
Conching times vary widely, from just a few hours to several days. Longer conching mellows and smooths the flavor, while shorter conching keeps more of the bold, raw character. The right choice depends on the flavor you’re chasing.
Step 8: Temper the Chocolate
Tempering is the step that separates amateur-looking chocolate from professional bars. Skip it, and your chocolate will turn out dull, soft, and streaky.
Tempering means carefully heating and cooling the chocolate to encourage the cocoa butter to form the right kind of crystals. Cocoa butter can solidify in several crystal forms, but only one gives you that crisp, glossy result.
When done right, the signs are unmistakable: a shiny, mirror-like surface and a clean, sharp snap when you break the bar. Get it wrong, and you’ll see fat bloom, those grayish-white streaks on the surface, along with a soft, crumbly, or grainy texture.
You can temper by hand on a cool marble slab, spreading and working the chocolate to control its temperature. Or you can use an automated tempering machine, which holds the chocolate at precise temperatures for you. Beginners often start by hand, then upgrade as their batches grow.
Step 9: Mold, Cool, and Package the Bars
You’re almost there. Once your chocolate is tempered, pour it into your molds. Give the molds a few firm taps or use a vibrating surface to shake out trapped air bubbles, which would otherwise leave holes in your finished bars.
Next comes cooling. As the chocolate sets, it contracts slightly, which helps it release cleanly from the mold with a satisfying glossy finish. A cool room works fine; just avoid the fridge, where moisture and odors can cause problems.
Finally, package your bars promptly. Good packaging protects chocolate from its three enemies: light, moisture, and strong odors. Many makers also use the label to share details such as the cacao percentage and the specific farm or region of origin, which tell your story and build trust with buyers.
Common Mistakes When Making Bean-to-Bar Chocolate
Even experienced makers stumble sometimes. Watch out for these frequent missteps:
- Inconsistent roast. Uneven roasting leaves sour or flat flavors that no later step can repair.
- Poor winnowing. Leftover shell pieces create a gritty, bitter texture in the final bar.
- Refining too briefly. Cutting the melting time short leaves the chocolate noticeably grainy.
- Overheating in the melanger. Too much heat can dull or flatten the delicate flavors you worked hard to develop.
- Improper tempering. Skipped or rushed tempering causes bloom, soft bars, and a lack of snap.
Tip: Keep a simple batch log. Write down your roast time and temperature, refining hours, and tempering numbers. This habit turns guesswork into a repeatable process and helps you improve with every batch.
Bean to Bar vs Mass-Produced Chocolate
So how does craft chocolate actually compare to what’s on the grocery shelf? The differences run deep.
- Ingredients. Craft bars usually contain just cacao, cocoa butter, and sugar. Mass-produced chocolate often adds emulsifiers, extra fats, artificial flavors, and fillers to cut costs.
- Process control. Bean-to-bar makers shape every single stage by hand, adjusting for each batch of beans. Large manufacturers prioritize speed and uniformity across millions of bars.
- Flavor complexity. Craft chocolate celebrates the unique, single-origin character of its beans, offering notes you’d never find in a candy bar. Mass-produced chocolate aims for one consistent taste, every time, everywhere.
- Pricing. Yes, craft bars cost more. But that price reflects careful sourcing, intensive labor, small batch sizes, and higher-quality beans. You’re paying for a genuinely different product, not just a fancier wrapper.
Frequently Asked Questions
What does bean-to-bar mean in chocolate?
Bean-to-bar means a single maker controls every step of production, from raw cacao beans to the finished chocolate bar. Nothing is outsourced, which gives the maker full control over flavor and quality.
Do you need a melanger to make bean-to-bar chocolate?
A melanger is the standard tool because it refines chocolate to a smooth texture that’s hard to achieve otherwise. Beginners sometimes experiment with food processors or wet grinders, but for truly smooth results, a melanger is the reliable choice.
How long does it take to make bean-to-bar chocolate?
Plan on a few days from start to finish. Roasting takes under an hour, but refining and conching in the melanger can run from several hours to two full days, and the chocolate then needs time to rest, temper, and set.
What is the difference between a chocolatier and a chocolate maker?
A chocolate maker starts with raw cacao beans and produces chocolate. A chocolatier starts with finished chocolate and crafts it into confections like truffles and bonbons.
Why is bean-to-bar chocolate more expensive?
The price reflects quality beans, ethical sourcing, intensive hands-on labor, and small-batch production. Unlike factory production, each step takes time and skill, and that care shows up in both the flavor and the cost.
Can beginners make bean-to-bar chocolate at home?
Absolutely. Many makers start in their own kitchens with an oven, a simple homemade winnower, and a small tabletop melanger. Begin with a single batch, take notes, and build your skills from there.
Does bean-to-bar chocolate always contain dairy?
No. Dark bean-to-bar chocolate is typically dairy-free, made from just cacao, cocoa butter, and sugar. Dairy only appears when a maker adds milk powder to create milk chocolate.
Conclusion
The most important lesson in bean-to-bar chocolate is that flavor is built long before the chocolate ever hits the mold. Every choice along the way, from the beans you source to how you roast, refine, and temper, leaves its mark on the final bar.
That’s what makes this craft so rewarding. It’s both an art and a precise, repeatable process you can sharpen batch after batch. The first time you snap a bar you made entirely from raw beans, you’ll understand why so many people fall in love with it.
So don’t wait for the perfect setup. Pick up a single-origin bag of cacao beans, dust off your oven, and run your first small batch this week. Your best chocolate is the one you’re about to make.