Melting chocolate seems like one of the easiest things you can do in a kitchen. Then a wisp of steam drifts into the bowl, or the burner runs a touch too hot, and suddenly your glossy chocolate has turned into a grainy, stubborn clump. It happens to almost everyone at first. The fix is rarely complicated, though. Once you understand how to melt chocolate in a double boiler, most of these frustrations will stop.
Nearly every chocolate failure traces back to four things: heat, moisture, poor tempering, and the wrong tools. Master those, and smooth results become the norm rather than the exception.
Here’s what you’ll learn:
- The double-boiler method, step by step
- Why chocolate seizes or burns, and how to prevent it
- How to rescue common problems when they strike
- How to store finished chocolate so it stays at its best
Whether you’re dipping strawberries, molding bars, or stirring chocolate into a batter, this guide will help you melt it the right way.
How to Melt Chocolate in a Double Boiler (Step by Step)
A double boiler melts chocolate with gentle, indirect heat, and that’s exactly why it gives beginners so much control. Rather than setting the chocolate over an open flame, you let warm steam do the work. That slow, even warmth is precisely what delicate chocolate craves.
What a Double Boiler Does and Why It Works
A double boiler is nothing more than a heatproof bowl set over a pot of simmering water. The steam warms the bowl, and the bowl warms the chocolate. Because the chocolate never touches the hot pan, it can’t scorch.
Direct stovetop heat works in the opposite way. It hammers the cocoa solids fast and hard, often burning them before the rest of the chocolate has even started to soften. Indirect steam maintains a mild, steady temperature, which protects both flavor and texture.
Tools You’ll Need
You don’t need anything fancy to set up a double boiler. Just gather these:
- A heatproof bowl (glass or stainless steel)
- A saucepan that the bowl can rest on without slipping in
- A silicone spatula
- A dry towel
One rule outranks all the others: every tool must be bone dry. Even a little water can wreck your chocolate, so wipe each piece down before you begin.
Step-by-Step Instructions
Follow these steps for smooth, melted chocolate every time:
- Chop the chocolate into small, even pieces so it melts at the same pace.
- Add about an inch of water to the saucepan, making sure it won’t touch the bottom of the bowl.
- Bring the water to a gentle simmer, never a rolling boil. Big bubbles throw off too much steam and heat.
- Set the bowl over the pan and stir the chocolate slowly as it starts to soften.
- Lift the bowl off the heat while a few solid pieces still remain.
- Keep stirring and let the leftover warmth melt the last bits. This is your best insurance against overheating.
That last step trips up plenty of beginners. Chocolate holds heat well, so pulling it off the stove a little early is the surest way to avoid burning it.
Common Double Boiler Mistakes
Even with the right method, a few small slips can cause trouble:
- Letting water touch the bowl, which overheats the chocolate
- Covering the bowl, which traps condensation that drips back in
- Cranking the heat, which sends up far too much steam
- Walking away, since chocolate can scorch quickly when left alone
Double Boiler vs. Microwave
Both methods work, but they suit different cooks. A double boiler is slower, safer, and more forgiving, which makes it ideal when you’re learning. A microwave is faster but quick to scorch. If you go that route, melt in 20- to 30-second bursts, stirring between each one.
Common Chocolate-Making Mistakes (Quick Overview)
Three enemies cause most chocolate failures: heat, moisture, and rough handling. Too much heat burns it. A few drops of water make it seize. Careless stirring or pouring can throw the texture off entirely.
These problems tend to surface during melting or cooling, when chocolate is at its most sensitive. The sections below break each one down so you can spot it early and respond before the batch is lost.
Why Melted Chocolate Seizes (and How to Fix It)
Seizing is the most common and maddening chocolate problem out there. It strikes when moisture meets melted chocolate, causing the cocoa and sugar particles to bind into a stiff, grainy mass.
What Seized Chocolate Looks Like
Properly melted chocolate is glossy and ribbons off the spatula. Seized chocolate is the opposite: dull, thick, and lumpy. It often resembles wet sand or a dry paste, and no amount of stirring can coax it back to smoothness.
Common Sources of Accidental Moisture
Water tends to sneak in from places you’d never suspect:
- Steam rising off the simmering pan
- A spatula that wasn’t fully dried
- Condensation from a lid resting over the bowl
- A bowl with a few stray droplets inside
This is exactly why dry tools and an uncovered bowl matter so much.
Can You Fix Seized Chocolate?
Sometimes. If the chocolate is headed for a sauce or a baked recipe, you can loosen it by stirring in a little warm liquid, such as cream or hot water, until it turns smooth again. In effect, you’re transforming it into a ganache-style mixture.
The catch is that seized chocolate rarely returns to a smooth, glossy state suitable for dipping or molding. Its structure has already shifted, and there’s no fully reversing that.
When to Repurpose Instead of Reuse
Don’t toss seized chocolate. Fold it into brownies, cakes, hot chocolate, or frosting. The flavor is still perfectly good, so it deserves a second life in recipes that don’t depend on a flawless coating.
Why Chocolate Burns or Turns Grainy
Excess heat scorches the cocoa solids, leaving a bitter, gritty result that no rescue can fully undo. Heat control is everything here.
Signs of Overheating
Keep an eye out for these warning signs:
- A bitter, faintly burnt smell
- A texture that thickens into a paste
- Lumps that refuse to smooth out
Direct Heat vs. Gentle Heat
Direct contact with a hot pan is the quickest path to a ruined batch. The cocoa solids pressed against that hot surface burn almost instantly. Gentle, indirect heat, like the steam from a double boiler, keeps the temperature low enough to keep the chocolate safe.
How to Prevent Scorching
A handful of habits make all the difference:
- Hold the water at a low simmer, never a hard boil
- Stir often to spread the heat evenly
- Pull the chocolate off the heat early and let it finish on its own
- Use a thermometer rather than trusting your guess
Why Chocolate Won’t Snap or Shine (Tempering Problems)
Tempering is the process of heating and cooling chocolate to align its cocoa butter crystals. It sounds technical, yet it’s the single thing that separates chocolate that looks homemade from chocolate that looks professional.
What Tempering Does
Well-tempered chocolate has a crisp snap, a mirror-like shine, and a stable set at room temperature. Skip it, and your chocolate stays soft, dull, and prone to melting the moment you touch it.
Why Bloom Happens
Bloom appears as white, chalky streaks or spots on the surface, and it comes in two forms. Fat bloom occurs when cocoa butter separates and rises to the surface, usually due to poor tempering. Sugar bloom occurs when moisture draws sugar to the surface, typically from improper storage. In both cases, the chocolate is still safe to eat. It just won’t win any beauty contests.
Basic Tempering Temperatures by Chocolate Type
Each type of chocolate has its own targets for melting, cooling, and working. Lean on a thermometer to hit these marks:
| Chocolate Type | Melt To | Cool To | Working Temp |
|---|---|---|---|
| Dark | 113–122°F (45–50°C) | 81–82°F (27–28°C) | 88–90°F (31–32°C) |
| Milk | 104–113°F (40–45°C) | 79–81°F (26–27°C) | 84–86°F (29–30°C) |
| White | 104–113°F (40–45°C) | 79–81°F (26–27°C) | 80–82°F (27–28°C) |
The Seeding Method for Beginners
The simplest way to temper at home is the seeding method. Melt about two-thirds of your chocolate, then stir in the remaining third in solid pieces. That solid chocolate is already tempered, so it “seeds” stable crystals into the melted batch. Stir gently until the whole bowl is smooth and sitting at the right working temperature.
Equipment Mistakes That Ruin a Batch
The right tools quietly prevent moisture, scorching, and uneven setting. The wrong ones quietly sabotage your work.
Best Bowls, Spatulas, and Thermometers
Reach for glass or stainless steel bowls, which wipe clean and won’t hold odors. Use silicone spatulas, which dry quickly and don’t absorb flavors. And invest in an accurate digital thermometer, because reading temperature by touch is a fast track to overheated or untempered chocolate.
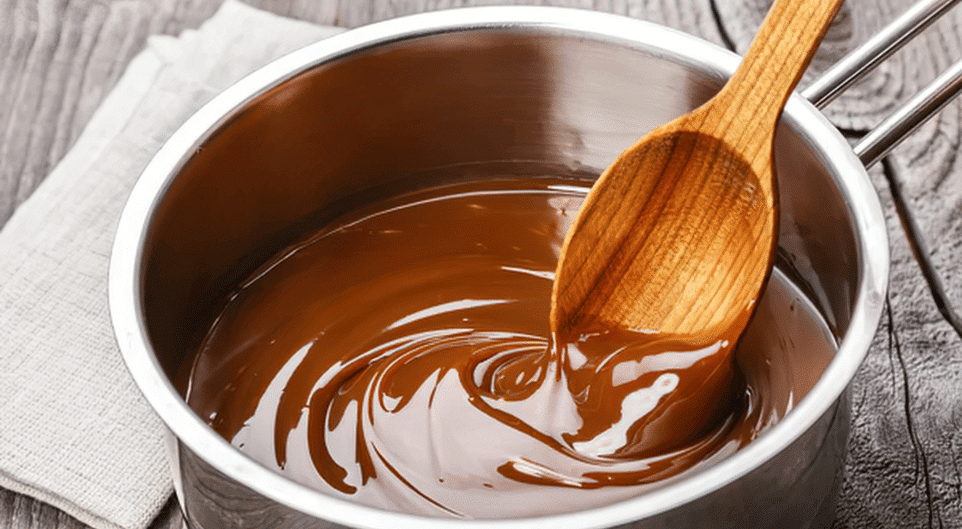
Why Wooden Tools and Wet Surfaces Cause Trouble
Wooden spoons may feel like the natural choice, but they cling to moisture and to odors from past meals. That trapped water can leach into your chocolate and cause it to seize. Damp counters and bowls do the same, so keep every surface dry.
Why Cold Molds and Cold Tools Matter
Cold equipment forces chocolate to set too fast and unevenly. Pour tempered chocolate into a chilled mold, and it can firm up before it settles into shape, leaving streaks or a flat, dull finish. Let molds and dipping tools come to room temperature first.
Ingredient and Storage Mistakes
What you add to chocolate and how you store it afterward matter just as much as how you melt it.
Adding Cold Cream or Extracts
Pouring cold cream or extracts straight into melted chocolate makes it clump and stiffen. The sudden temperature drop shocks it. Warm your additions to room temperature first, and they’ll blend in cleanly.
Water-Based Flavorings and Food Coloring
Water-based products are a hidden hazard. Even a small amount of water-based flavoring or coloring can seize your chocolate. Reach for oil-based flavorings and oil-based or powdered colors instead, since they mix in without introducing moisture.
How to Store Finished Chocolate Properly
Skip the refrigerator. Its cold, humid air invites sugar bloom and lets chocolate soak up odors from nearby foods. Store finished chocolate in a cool, dark, dry cupboard instead, ideally between 60 and 70°F. Wrap it well to keep moisture and strong smells at bay.
Quick Troubleshooting Table
When something goes sideways, use this table to diagnose the problem and decide what to do next:
| Problem | How It Looks | Likely Cause | Quick Fix | Best Use Afterward |
|---|---|---|---|---|
| Seized chocolate | Thick, grainy, stiff | Moisture got in | Stir in warm liquid to make a ganache | Sauces, baking |
| Burned chocolate | Bitter smell, scorched | Too much heat | Hard to save; discard if badly burnt | Limited use |
| Bloom | White streaks or spots | Poor tempering or storage | Re-melt and temper | Baking, melting |
| Won’t set | Soft, dull, sticky | Untempered | Re-melt and temper properly | Re-melt and start over |
| Too thick | Won’t coat smoothly | Overheated or cooled too far | Stir in a little cocoa butter | Dipping, drizzling |
Best Uses for Properly Melted Chocolate
Once you’ve melted chocolate the right way, the possibilities open up. Smooth, glossy chocolate is perfect for:
- Dipping fruit, pretzels, or cookies
- Molding bars, bonbons, and shapes
- Drizzling over desserts as a finishing touch
- Simple ganache for fillings and frostings
- Folding into batters for brownies and cakes
Match your method to your goal. If you want a crisp snap and a high shine, take the time to temper. If the chocolate is simply going into a recipe, a basic melt is all you need.
Frequently Asked Questions
How do you melt chocolate in a double boiler?
Chop the chocolate, set a dry heatproof bowl over a saucepan with a small amount of gently simmering water, and stir slowly until almost melted. Remove from heat and let the residual warmth finish the job.
Why does melted chocolate seize?
Seizing occurs when even a small amount of water comes into contact with melted chocolate. The cocoa and sugar particles clump together, turning the chocolate thick and grainy. Keep every tool dry and never cover the bowl.
Can seized chocolate be fixed?
Sometimes. For sauces or baking, you can loosen it with warm liquid or turn it into a ganache. It usually can’t be restored to a smooth texture for dipping or molding.
Is a microwave or a double boiler better for melting chocolate?
A double boiler offers more control and is safer for beginners. The microwave is faster but scorches easily, so melt in short bursts and stir between each.
What temperature should melted chocolate reach?
It depends on the type. Dark chocolate melts around 113–122°F, while milk and white chocolate melt around 104–113°F. Tempering targets are lower, so use a thermometer instead of guessing.
Why does chocolate get white streaks after it sets?
Those streaks are blooms, caused by fat or sugar separating due to poor tempering or improper storage. Re-melting and tempering the chocolate usually fixes it.
Why won’t my chocolate snap after cooling?
Untempered chocolate stays soft and dull because the cocoa butter crystals never align. Temper it using the seeding method to get a firm snap and shine.
Can I add cream or flavoring to melted chocolate?
Yes, but warm any cream or extracts to room temperature first and avoid water-based flavorings, which can cause the chocolate to seize.
Why did my chocolate stick to the mold?
Cold molds, untempered chocolate, or removing it too early are the usual causes. Use room-temperature molds and properly tempered chocolate for a clean release.
How do I thin chocolate that’s too thick for dipping?
Stir in a small amount of melted cocoa butter or a neutral oil. Avoid water, which will seize the chocolate.
Great chocolate comes down to respecting heat and moisture. Keep your tools dry, your heat gentle, and your hands patient, and smooth, glossy results will follow batch after batch. Start with the double boiler method, practice on small amounts, and before long, you’ll be tempering and dipping with the kind of confidence that once seemed out of reach.