
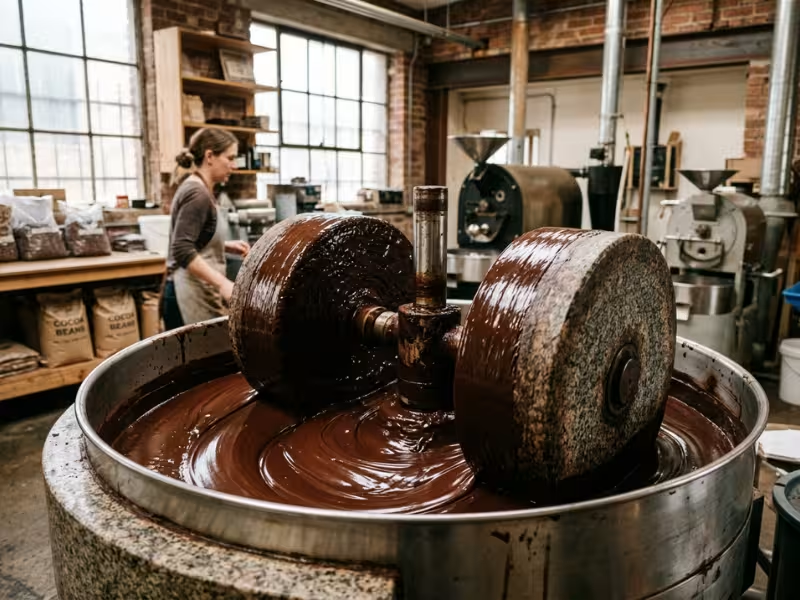
Many new chocolate makers grind their first batch of cacao nibs and take a taste. It feels sandy and rough. Yet finished chocolate should melt smoothly on the tongue.
Heat alone won’t fix that. Melted cacao still carries coarse nib particles and sharp sugar crystals.
I help small makers build their first bean to bar line and run their refining equipment. Most of them solve the texture problem with one machine: the chocolate melanger. Its stone wheels grind, refine, and smooth the batch over many hours, until the grit turns into silk.
Why Fresh Cacao Starts Out Gritty
When a maker hands me a spoonful of their first liquor and asks why it tastes like wet sand, I start with the particles. The grit comes from the solids suspended in the chocolate. It has little to do with how warm or runny the batch is.
Roasted nibs break into hard, jagged fragments. A juicer, grain mill, or food processor turns them into a paste, but most pieces still measure well over 100 microns. Many keep sharp edges and uneven shapes, and your tongue picks those up right away.
Sugar makes the problem worse. Granulated sugar crystals often measure 300 to 600 microns across, far bigger than anything you want in a finished bar. They don’t dissolve in chocolate because chocolate holds almost no water. They stay solid until something grinds them down.
This step fools many beginners. They warm the paste until it flows like syrup and assume the work is done. But melting only frees the cocoa butter. The solid particles keep their size, so the liquor pours smoothly and still tastes rough.
Smoothness depends on two things:
- Particle size. Most solids need to drop to roughly 20 to 30 microns before your tongue stops noticing them.
- Distribution. A small share of large particles can still make a batch feel grainy, even when the average looks fine.
So the real job is to shrink nearly every particle while keeping the mass fluid enough to move. That takes steady grinding over many hours.
What a Melanger Actually Does
People often picture a melanger as a fancy blender. It works more like a tiny stone mill that never stops turning.
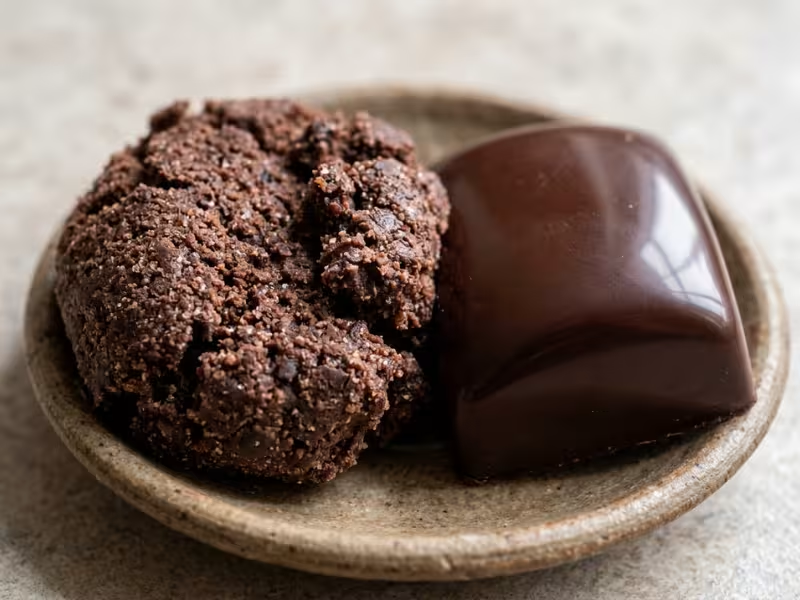
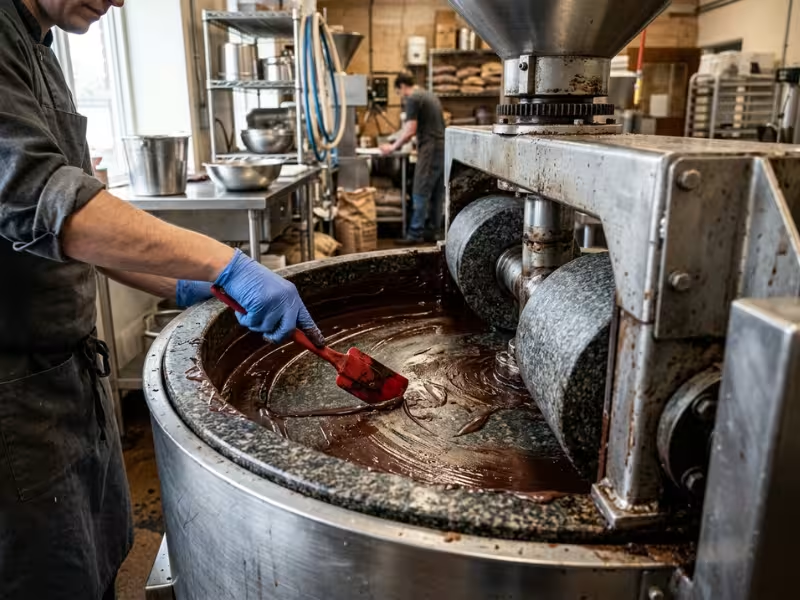
Inside, two heavy granite wheels sit on a granite base. The bowl spins, and the wheels roll and drag against the stone floor beneath them. Every rotation pulls chocolate into the narrow gap between wheel and base. The stones crush and shear the particles there, then push them back into the flow. A scraper arm folds the mass back toward the wheels, so nothing sits idle in a corner.
That simple motion handles three jobs at once:
- Refining. The stones grind nib fragments and sugar crystals smaller with every pass, from well over 100 microns down toward the 20-micron range.
- Mixing. The constant churn spreads cocoa butter around every particle. Sugar, milk powder, and extra cocoa butter blend in evenly.
- Conching. Friction warms the batch, and the open top lets air move across the surface. Over many hours, moisture and harsh acids drift off, and the flavor softens.
Large factories split these steps across separate machines. A melanger puts them in one bowl. For a small maker, that saves money, floor space, and a lot of transfers between vessels.
Movement matters as much as grinding. A still batch thickens, cools, and lets heavy particles settle. The melanger keeps everything flowing, so the stones reach every particle many times over a long run.
Picture how the batch changes. In the first few hours, it looks thick and dull, and it tastes gritty. By the end, it pours glossy and fluid, and it coats your tongue evenly. You now have real chocolate, ready to temper, mold, or age.
The machine doesn’t make those choices for you. It simply gives you a smooth, stable mass to work with.
How Stone, Time, and Friction Change Texture and Flavor
A melanger works slowly, and that slow pace does most of the good. Three forces shape every batch: how small the particles get, how long the run lasts, and what kind of surface does the grinding.
Particle Size and the Smoothness Threshold
I use 20 microns as my working target. Below that, most tongues stop picking up individual particles. Push much finer, and the chocolate can turn thick and pasty, because the extra surface area soaks up cocoa butter.
The average size only tells half the story. A batch can test at 18 microns on average and still feel sandy. The culprit is the tail: a few percent of particles stuck at 40 or 50 microns. Your tongue finds those first.
So I don’t judge by the clock. If a client owns a micrometer, we use it. If not, I press a small drop against the roof of my mouth. Any faint scratch means the stones still have work to do.
Grinding fixes texture. Time fixes flavor, and the two don’t always finish together.
What Happens During Long Runs
Fermented cacao carries leftover moisture and volatile acids, mostly acetic acid. Fresh liquor often smells sharp, almost like vinegar. With the lid off, friction heat drives those compounds out over many hours.
That same heat keeps the liquor fluid. Most batches settle around 40–50°C. A warm, fluid mass flows back under the wheels, so grinding continues. A cool, thick one stalls.
Flavor rounds out next. Astringency fades, bitterness softens, and fruity or nutty notes come forward. Then the curve turns. Run a delicate origin too long, and those bright notes flatten into generic “chocolate.” I taste every 6 to 12 hours. When two samples in a row taste the same, I stop.
The stones themselves explain why this slow process works at all.
Why Stone Action Matters
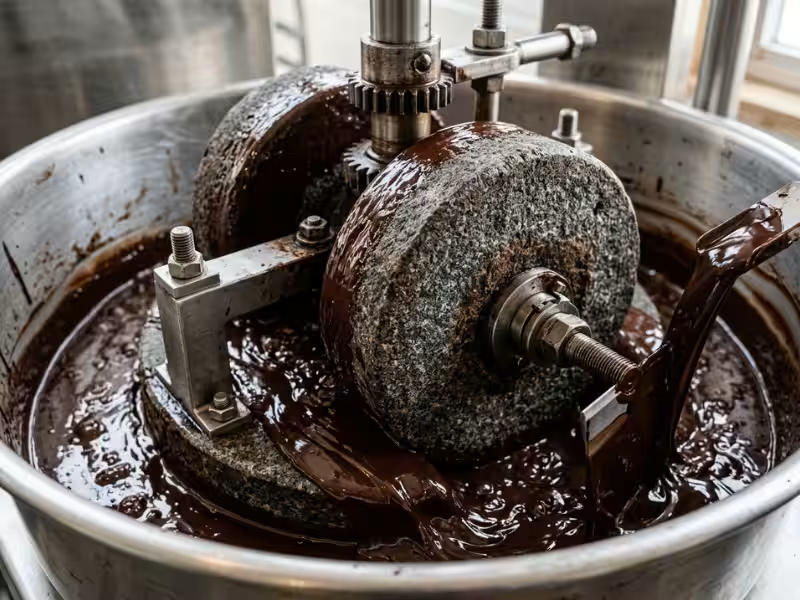
Granite shears particles instead of shattering them. The wheel drags across the base and wears fragments down along their edges. That gives you a tighter, more even size spread.
Stone surfaces also carry micro-roughness. New stones feel coarser, so they cut fast but can shed a little grit. I always run a throwaway batch of sugar or cheap nibs first. After a few runs, the wheels and base wear to match each other. Contact improves, and results turn consistent.
Steel blades behave differently. They fracture particles, leave a wide size range, and spike the heat in seconds. They also can’t run for 48 hours straight. That’s why a blender never reaches true chocolate smoothness.
Melanger vs. Conche: What the Terms Really Mean
Clients often ask me if they need a melanger, a conche, or both. The confusion makes sense, because craft makers use these words loosely. Once you see what each step does, the choice gets much easier.
What Conching Really Means
Rodolphe Lindt built the first conche in 1879. His machine pushed warm chocolate back and forth in a shell-shaped trough for hours. The name comes from “concha,” the Spanish word for shell.
Conching doesn’t aim to grind. It works the chocolate with heat, air, and steady motion. Moisture and harsh acids escape, and cocoa butter coats every particle. The texture turns silky, and the flavor mellows.
Refining is a different job. It shrinks the particles, while conching polishes what refining leaves behind.
A melanger blurs that line, and that’s where most of the mix-ups start.
One Bowl vs. a Full Factory Line
A melanger refines and conches in the same bowl. The stones grind, while friction heat and the open top give you a gentle conching effect. You can’t fully separate the two.
Industrial plants handle them in separate stages. A five-roll refiner grinds a dry paste to size in minutes. The mass then moves into a conche that runs dry, pasty, and liquid phases at tightly controlled temperatures. Each machine handles a ton or more at a time.
When you choose a melanger, you accept a few tradeoffs:
- Linked timing. Texture and flavor develop together. If the batch reaches 20 microns before the sharp acids clear, you have to keep running, even as the bright notes start to dull.
- Milder heat and airflow. Most melangers sit near 40–50°C with limited air movement. Very acidic beans may need a fan over the bowl or a longer lid-off stretch.
- Small batches. Most units top out at a few kilos.
For most small makers, those limits feel fair. One machine, one bowl, and a few kilos of control often beat a production line you can’t afford or fill.
How to Run a Melanger Well
Most failed batches I see go wrong in the first hour, long before the stones do any real work. Get the start right, and the rest of the run mostly takes care of itself.
Setup and Loading
Fill the bowl to about 70–80% of its rated capacity. A 2 kg melanger handles roughly 1.5 kg of chocolate comfortably. Go past that, and the wheels ride up on the mass or stall the motor.
Warm everything first. I run a hair dryer over the bowl and stones for 5 to 10 minutes and warm the nibs to about 50°C in a low oven. Cold granite pulls heat from the liquor, and it thickens fast.
Then load slowly. Start the machine and add nibs a cup at a time. Wait until each addition turns liquid before you add more. Pre-ground nibs speed this up a lot.
If the liquor turns stiff early, add 2–3% melted cocoa butter. A fluid batch flows under the wheels. A stiff one just gets pushed around the bowl.
Once the liquor runs like warm syrup, you can bring in the other ingredients.
When to Add Sugar and Other Ingredients
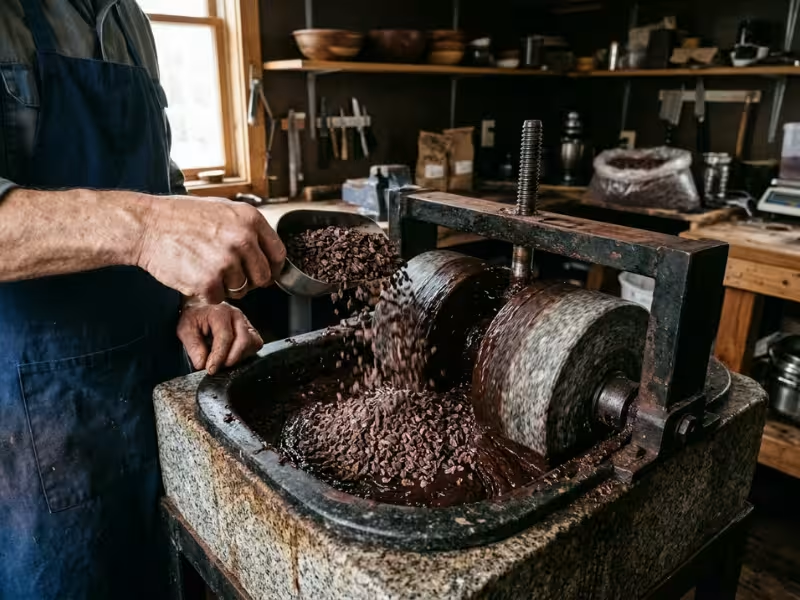
I wait 1 to 3 hours, until the nibs form a smooth, flowing liquor. Sugar needs a fluid base to grind in. Add it too early, and the dry mass clumps, strains the motor, and may never fully refine.
Add sugar a few spoonfuls at a time. Warm it first, or use powdered sugar to ease the grinding load. Treat milk powder the same way, and add it after the sugar, because it thickens the batch quickly.
Save vanilla and other flavors for the last hour or two. Long runs drive off delicate aromas.
With everything in, your job shifts from feeding the machine to watching it.
How to Check Texture and Know When to Stop
Check the temperature every few hours with a probe thermometer. Most dark batches settle at 40–50°C. Keep milk chocolate under about 45°C. If the batch passes 55°C, or the motor housing feels too hot to touch, open the lid or aim a fan at the bowl.
Every 6 to 12 hours, I run two quick texture checks:
- Tongue test. Press a small drop against the roof of your mouth. Any scratch means the batch needs more time.
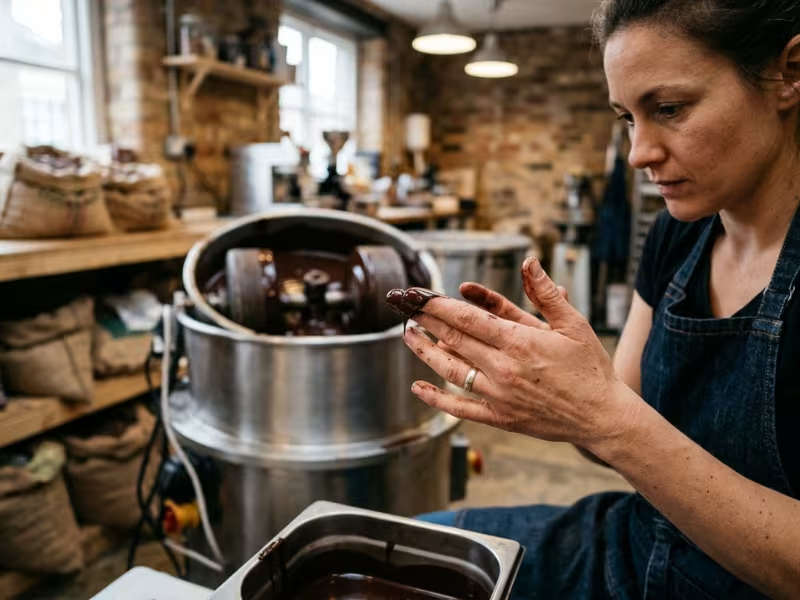
- Finger rub. Rub a drop between your thumb and finger. Smooth chocolate feels slick, like lotion. Grit shows up as tiny drag points.
Log the time, temperature, and taste notes at each check.
Stop when two samples in a row feel and taste the same. Past that point, extra hours rarely add smoothness. They mostly flatten flavor and burn electricity.
Common Reasons Chocolate Stays Gritty Even After Long Runs
When a maker tells me their batch still feels sandy after two days, I rarely blame the machine. I ask what happened in the first few hours. Most grit gets locked in early, and the stones spend the rest of the run fighting it.
- The batch ran too dry at the start. Low-fat beans or cold equipment leave a stiff paste. The wheels ride over it instead of grinding it. If the liquor looks like peanut butter after the first hour, add 2–3% melted cocoa butter and warm the bowl. Real grinding starts only once the mass flows.
- Sugar went in too soon. Sugar brings no fat of its own. Add it to half-ground nibs, and it soaks up what little cocoa butter you have. The batch clumps, and coarse crystals hide inside those clumps. Wait until the nibs run like warm syrup, then add sugar gradually.
- The bowl was overloaded. Past about 80% of rated capacity, the wheels lift off the base. The machine still turns and sounds busy, but little chocolate passes under the stones. Weigh every batch. A slightly smaller load often finishes smoother and faster.
- The pre-grind was too coarse. Whole or roughly cracked nibs force the melanger to handle the heavy crushing first. That steals hours from fine refining. A quick pass through a juicer or grinder gives the stones a much better start.
- New stones haven’t bedded in. Fresh wheels and a new base don’t match yet, so contact stays patchy. Some particles slip through untouched, and new granite can shed fine grit. Run one or two throwaway batches of sugar or cheap nibs before your first real batch.
- You trusted the clock. “48 hours” is an average, not a promise. Bean variety, sugar size, and batch weight all shift the timing. A few stubborn particles at 40 microns can keep a batch gritty after most of it feels fine. If the grit stays the same across three checks, review your loading before you add more time.
Honest Tradeoffs: When a Melanger Makes Sense, and When It Doesn’t
I like melangers. I still talk some clients out of buying one. The machine does one job beautifully, but it asks a lot in return.
Time and power add up. A typical batch runs 24 to 72 hours. A home-size unit draws roughly 250 to 400 watts, so a 48-hour run uses about 12 to 20 kWh. That stays cheap per batch. The bigger cost is the bowl itself. You can’t start a new batch until the current one finishes, so one machine gives you two or three batches a week at most.
Noise and cleanup come with it. Expect a steady rumble for two days straight, about as loud as a running dishwasher. Keep it away from bedrooms and thin office walls. After each run, plan 30 to 45 minutes to scrape the heavy stones and clean the basin.
Small batches are where it shines. For 1 to 5 kg, nothing beats it on control and price. You can test a new origin, adjust the sugar, and taste every few hours. That’s how makers really learn their beans.
Scaling gets ugly fast. Doubling output means doubling machines. Ten melangers mean ten bowls to load, ten to clean, and ten batches that never quite match. Floor space, labor, and inconsistency all grow with every unit you add.
So when should you skip it? If you sell bonbons, enrobed bars, or dipped treats without leaning on an origin story, buy good couverture instead. You’ll get steady texture and more hours for fillings, design, and sales.
Growth-stage makers usually move on once they need more than 50 to 100 kg a week. At that point, most of them switch to a chocolate ball mill or a chocolate refiner conche. These systems refine larger batches in hours, not days, and they hold texture steady from run to run.
Here’s how the main options compare:
|
Equipment |
What it does well |
Main limitation |
Best for |
|---|---|---|---|
|
Melanger |
Fine refining plus gentle conching in one bowl |
Slow runs and poor scalability |
Home makers and small bean-to-bar startups |
|
Blender / food processor |
Fast rough pre-grind of nibs |
Can’t reach smooth texture or run for days |
Pre-grinding only |
|
Ball mill |
Fast refining with steady particle size |
Higher cost; often needs a separate conching step |
Growth-stage makers scaling output |
|
Refiner-conche |
Refining and conching with tighter process control |
Larger footprint and investment |
Commercial production with steady demand |
My rule is simple. Buy a melanger to learn your beans and prove your recipe. Move beyond it once customer demand, not curiosity, starts setting your schedule.
Cleaning, Maintenance, and Practical Habits
A melanger can run for years. Most tired machines I inspect suffered from rushed cleanup, not hard work.
Clean while the bowl is still warm. Pour out the chocolate, then scrape the stones and basin with a silicone spatula. Wipe off the last film with paper towels. Warm cocoa butter lifts away in minutes. Cold, set residue can take an hour of chipping, and old residue can turn rancid and taint your next batch.
Treat water with caution. Granite absorbs moisture, and a damp stone can seize the next batch. If you wash the bowl and wheels, towel them dry, then warm them with a hair dryer or let them air-dry for a full day. Keep water away from the motor base.
Dairy needs stricter rules. Milk powder leaves a film that can spoil and carry allergens into a dairy-free bar. After every milk batch, wash and dry everything fully. Many of my clients keep a separate stone set for milk chocolate. Others schedule dark batches first and milk last.
A few small habits protect both the machine and your results:
- Loosen the wheel tension before storage, so the springs don’t weaken.
- Check the scraper and drive belt every few batches.
- Log run hours for each stone set. Worn stones explain sudden changes in texture.
FAQs
How long should chocolate stay in the melanger?
Most dark batches need 24 to 72 hours. Small loads made from finely pre-ground nibs often finish near 24 hours. Milk chocolate and fuller bowls usually run longer. Let your tongue decide, not the clock, and stop when two checks in a row feel and taste the same.
Do I need to pre-grind cacao nibs first?
You don’t have to, but it helps a lot. Whole nibs force the stones to do the heavy crushing first, which strains the motor and adds hours to the run. A quick pass through a juicer or grinder turns nibs into a rough paste, so the melanger can start fine refining right away.
Why does my chocolate still feel gritty after 48 hours?
Look at the first few hours of the run. Any of these can lock in grit early:
- The batch started too dry.
- You added sugar too soon.
- You overfilled the bowl.
- The new stones hadn’t bedded in yet.
A small share of particles stuck at 40 microns can also feel sandy, even when most of the batch feels fine. Fix your loading on the next batch before you add more hours.
Can I use a blender or food processor instead?
Not for finished chocolate. Steel blades shatter particles and leave a wide range of sizes. They also overheat the mass within minutes, and most motors can’t run for days. A blender works fine for pre-grinding nibs, but the stones still have to do the real refining.
What size melanger should I buy for home use?
Most home makers do well with a 1.5 to 2 kg unit. Since you fill it to only 70–80% of capacity, a 2 kg bowl gives you about 1.5 kg of chocolate, or roughly 15 to 20 bars per batch. If you plan to sell or gift in volume, look at a 5 kg model. Buy for the batches you’ll actually run each week.
Does longer conching always improve chocolate?
No. Extra hours soften acidity and astringency up to a point. Past that point, delicate fruity and floral notes fade into flat, generic chocolate. Bold, acidic beans may handle 60 hours or more, while bright origins often peak much sooner. Taste every 6 to 12 hours, log your notes, and stop once the flavor stops improving.
Conclusion
Smooth chocolate doesn’t come from heat or luck. It comes from steady particle reduction plus enough time for flavor and texture to settle.
A melanger handles the grinding, mixing, and gentle conching. Your choices still decide the result. When you add sugar, how full you load the bowl, and when you stop all shape the final bar.
So start with one controlled batch. Weigh your nibs and sugar. Every 6 to 12 hours, write down the time, the temperature, and how the chocolate tastes and feels. Compare those notes when the batch ends. Then change one thing on the next run and see what it teaches you.